Setting Up for Special Inspections Engineer Reports
To set up a permit application for Special Inspections Engineer Reports (a.k.a. SIERs), proceed with the standard process for a commercial permit application until reaching the SET UP FOR SPECIAL INSPECTIONS ENGINEER REPORTS workflow step. Then, follow the bullet-pointed instructions which are shown just below. For detailed step-by-step instructions on the process, instead follow the numbered instructions located further below.
Check the corresponding commercial plan review to determine if Special Inspections are necessary.
Pull the STATEMENT OF SPECIAL INSPECTIONS submittal from the plan review and upload it to the permit application.
Add the text of ***SPECIAL INSPECTIONS ENGINEER REPORTS REQUIRED*** to both the Project Description and a Tag Note on the permit application.
Mark the preloaded SPECIAL INSPECTIONS ENGINEER REPORTS REVIEW inspection as required on the permit application.
Mark the preloaded SPECIAL INSPECTIONS ENGINEER REPORTS submittal as both required and deferred on the permit application.
Add the corresponding Special Inspections Engineer of Record as a THIRD PARTY contact on the permit application.
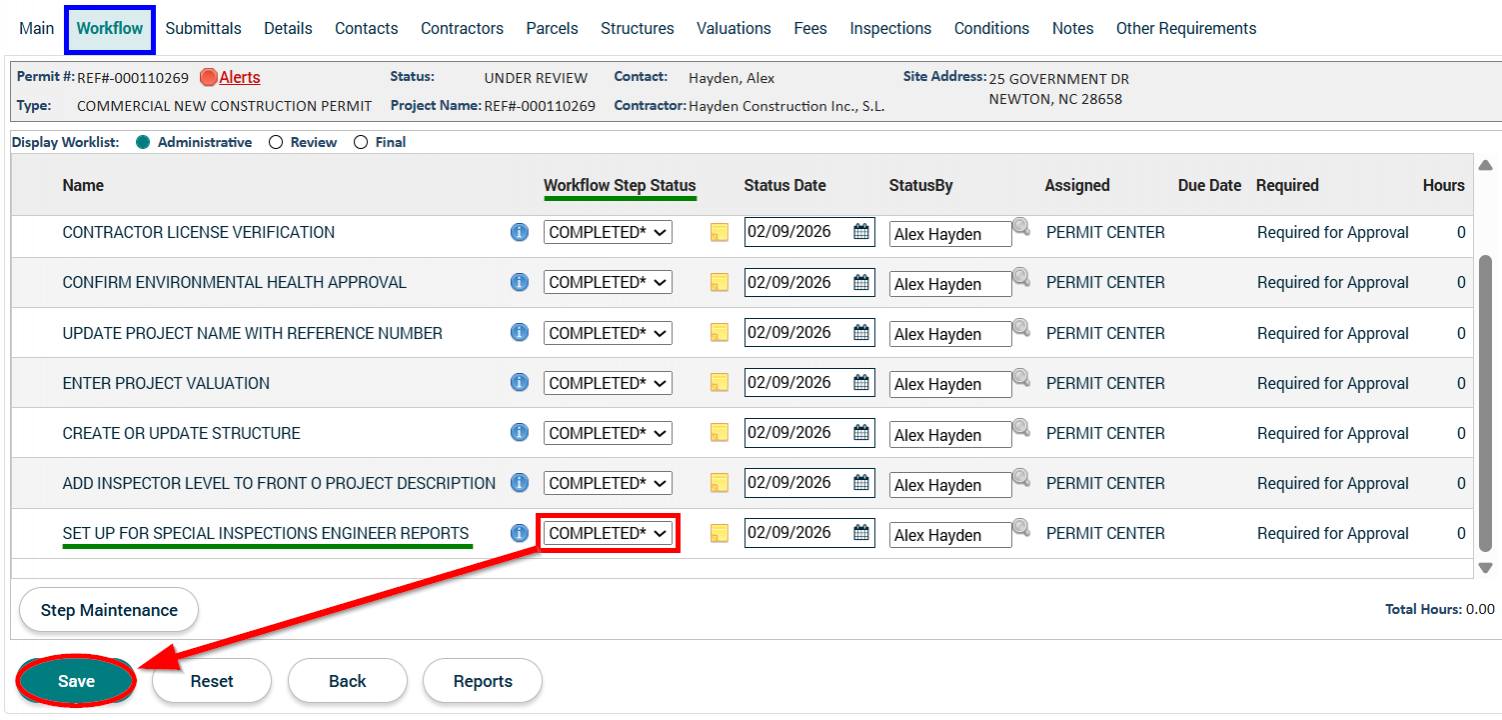
Update the status of the SET UP FOR SPECIAL INSPECTIONS ENGINEER REPORTS workflow step.
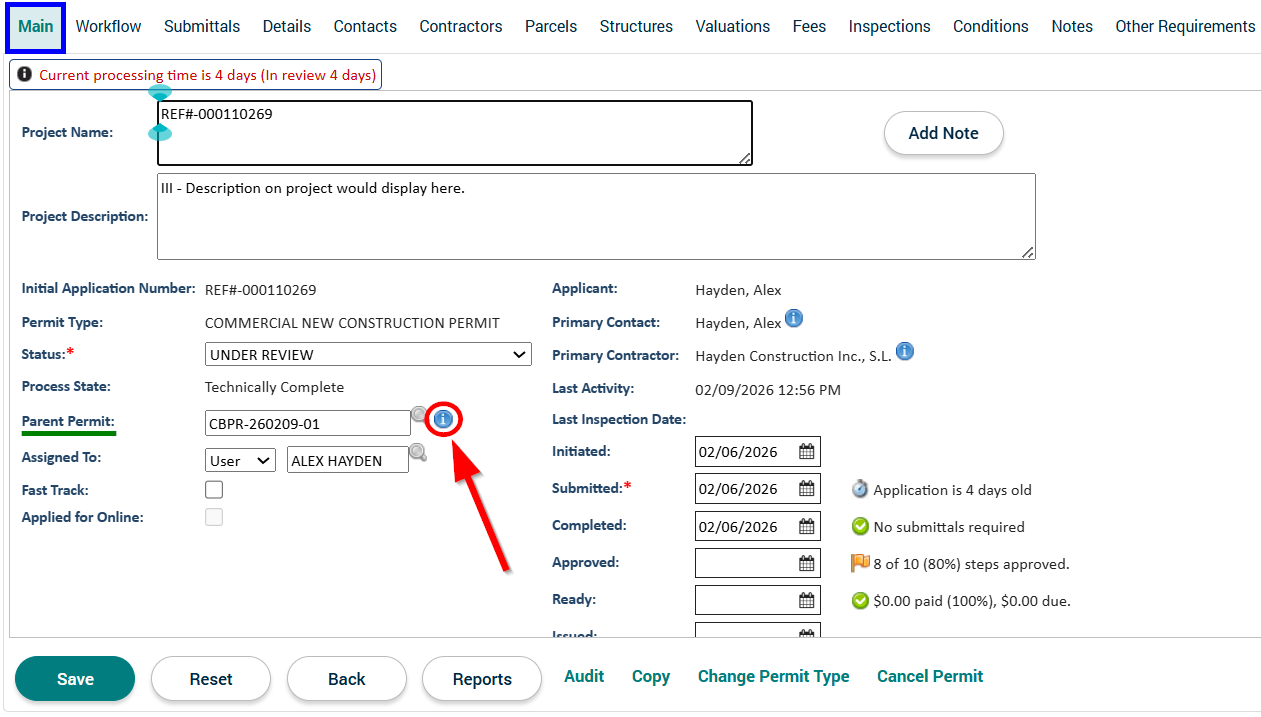
1. In the permit application, navigate to the Main tab and press on the blue ![]() button on the same line as the Parent Permit containing the corresponding plan review application number.
button on the same line as the Parent Permit containing the corresponding plan review application number.
2. In the plan review application, navigate to the Details tab, scroll down to the SPECIAL INSPECTIONS REQUIRED row, and confirm that "Yes" is shown for the Value.
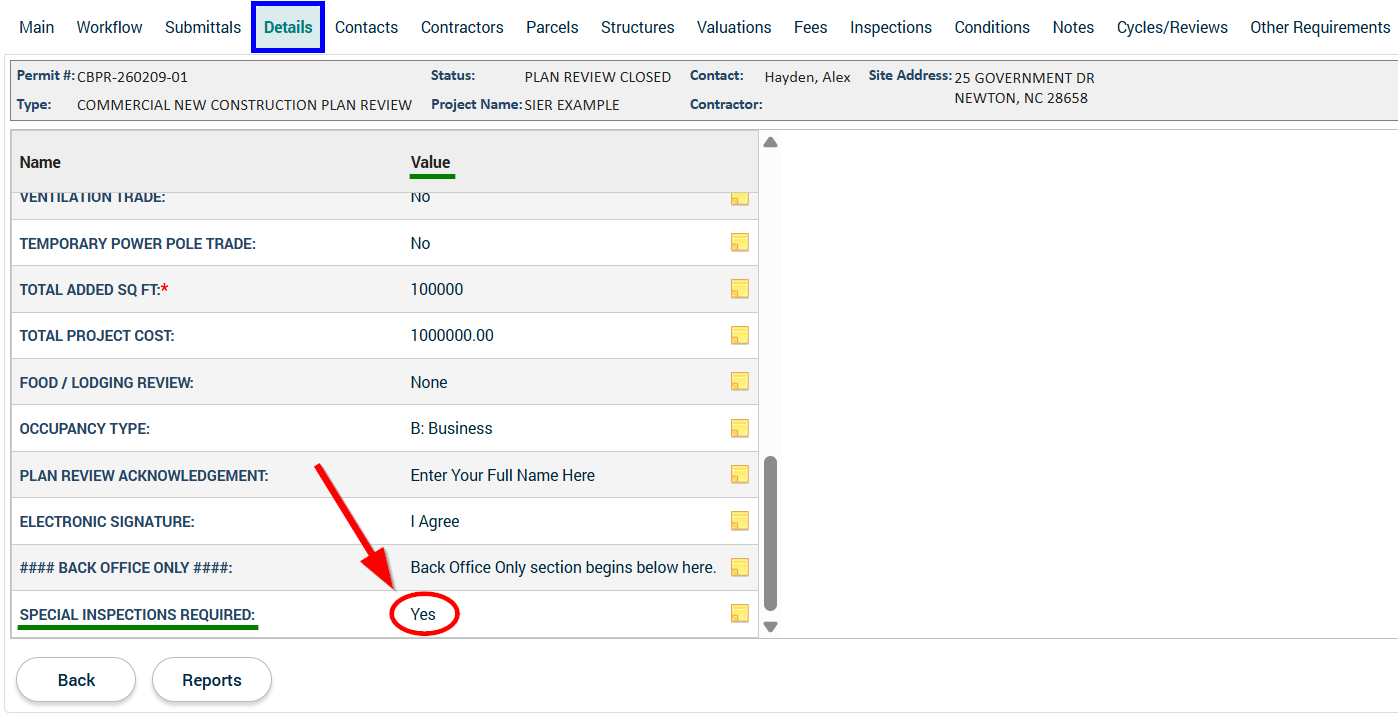
- NOTE: If the Value on the SPECIAL INSPECTIONS REQUIRED row is blank, it means that Special Inspections are NOT required. If this is the case, instead of following the remaining steps below, return to the permit application's Workflow tab and scroll down. Select "N/A" for the SET UP FOR SPECIAL INSPECTIONS ENGINEER REPORTS workflow step's status and then press the Save button on the bottom-left of the webpage.
![]()
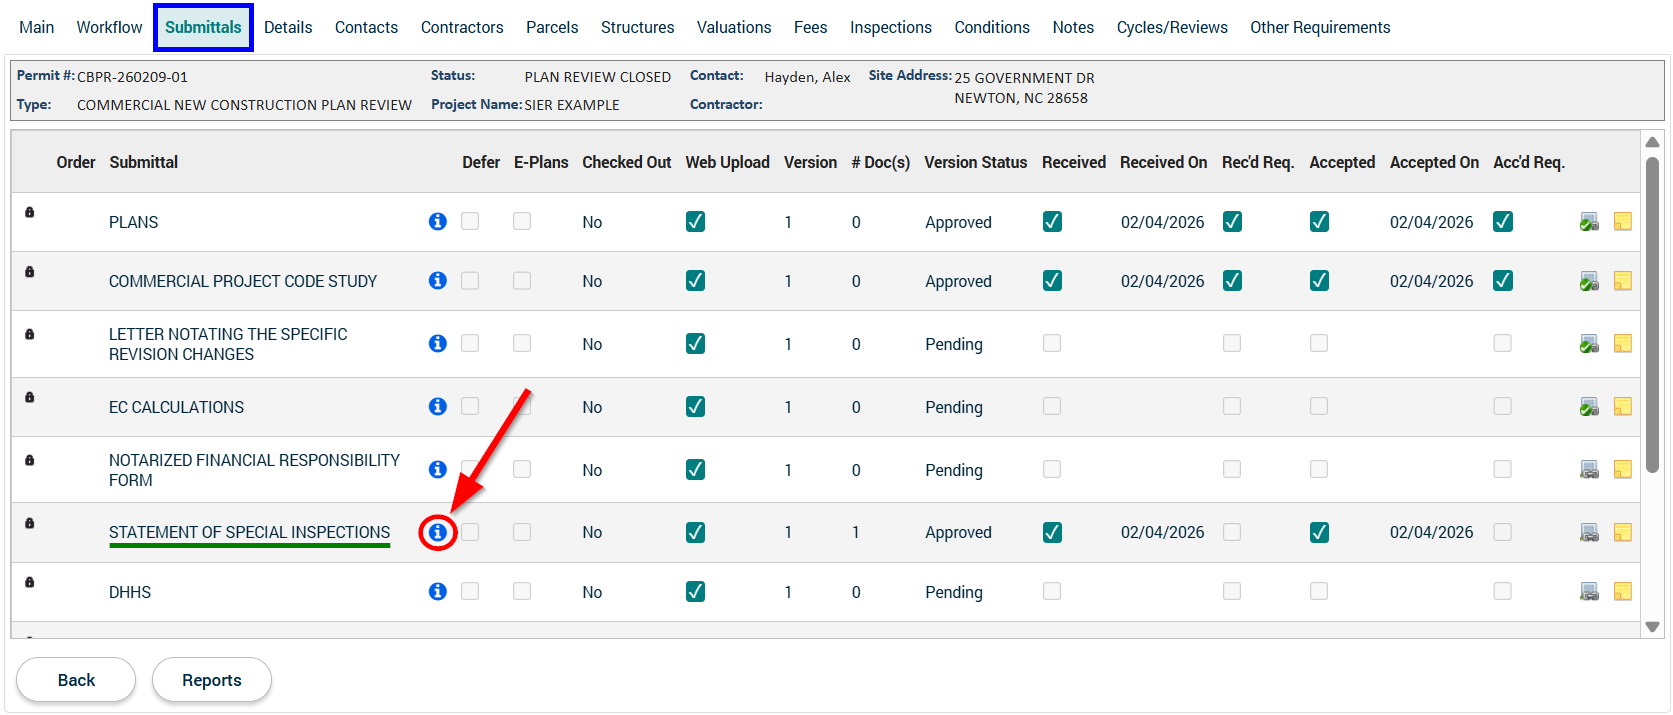
3. In the plan review application, navigate to the Submittals tab, and press the blue ![]() button on the same line as the STATEMENT OF SPECIAL INSPECTIONS submittal.
button on the same line as the STATEMENT OF SPECIAL INSPECTIONS submittal.
4. In the Permit Submittal pop-up window, click on the hyperlink for the Submitted File, download the STATEMENT OF SPECIAL INSPECTIONS document, and then press the Close button.

5. In the plan review application, press the Back button on the bottom-left of the webpage to return to the permit application.

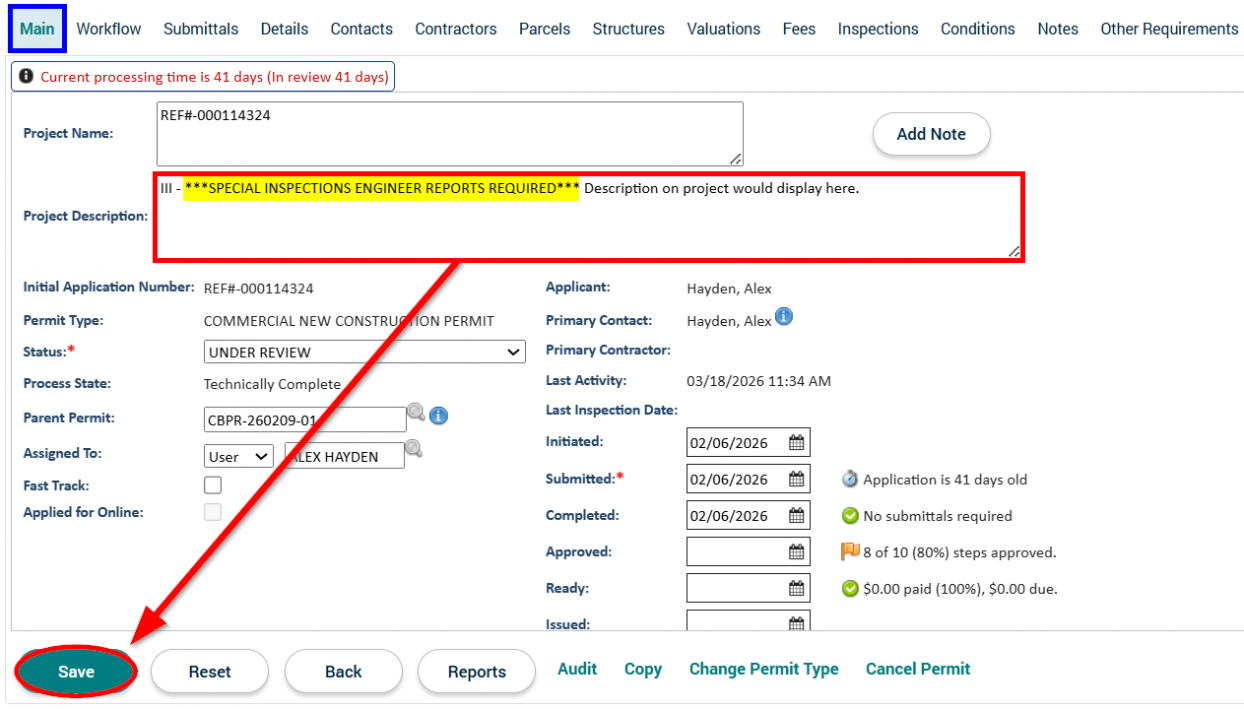
6. In the permit application's Main tab, go to the "Project Description" field, type in ***SPECIAL INSPECTIONS ENGINEER REPORTS REQUIRED*** after the inspector's level (i.e. I, II, or III), and press the Save button.
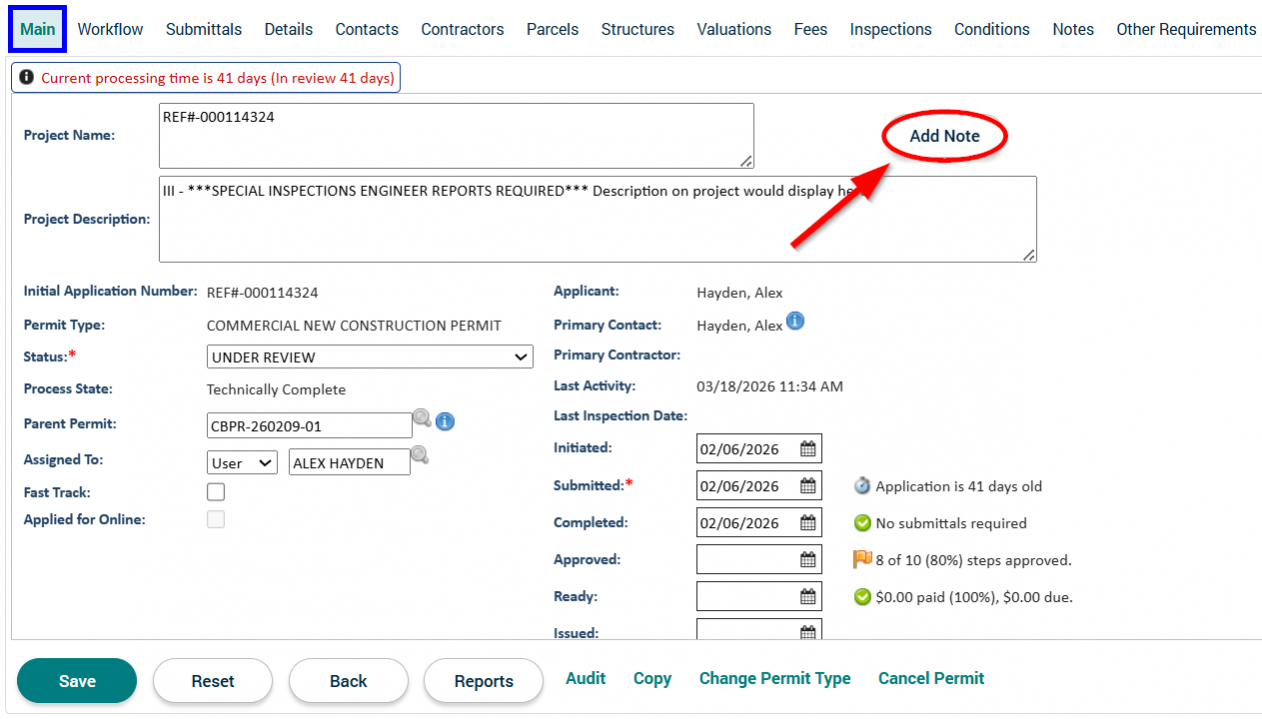
7. While still in the permit application's Main tab, press the Add Note button.
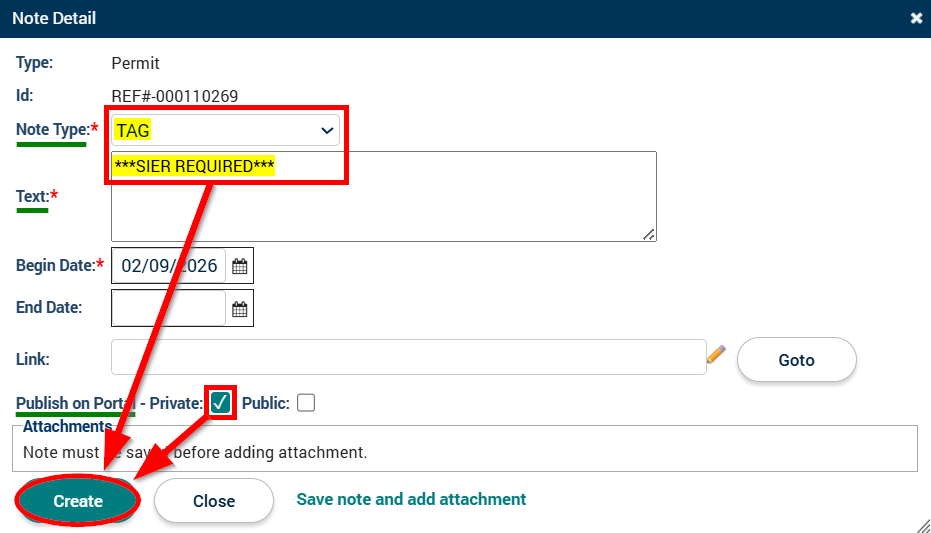
8. In the Note Detail pop-up window, select "TAG" for the Note Type, type ***SPECIAL INSPECTIONS ENGINEER REPORTS REQUIRED*** into the "Text" field, check the "Private" box next to "Publish on Portal," and press the Create button.
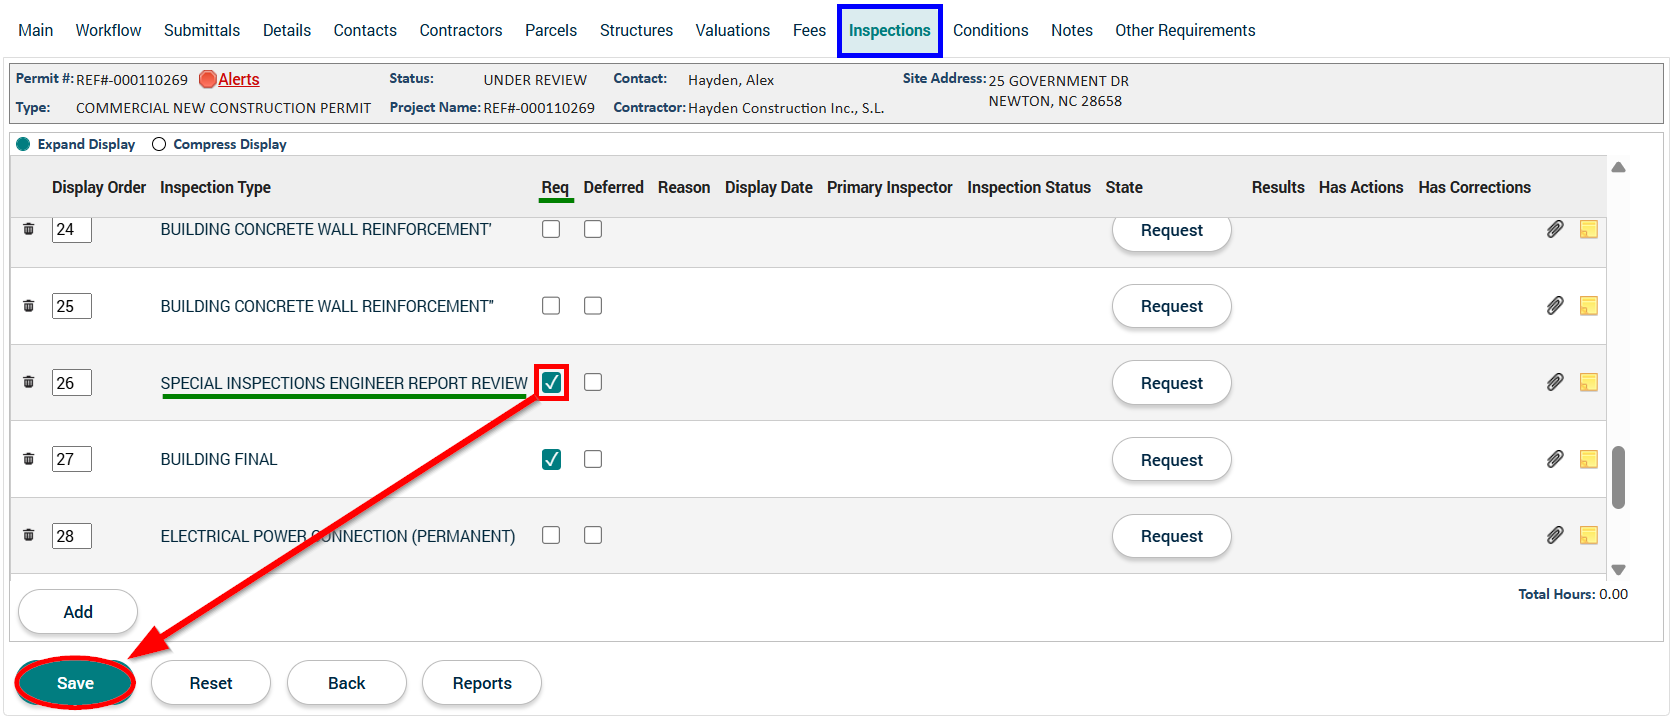
9. In the permit application, navigate to the Inspections tab, scroll down to the SPECIAL INSPECTIONS ENGINEER REPORTS REVIEW inspection, and check the "Req" (a.k.a. "Required") box next to the SPECIAL INSPECTIONS ENGINEER REPORTS REVIEW inspection. Then, on the bottom-left of the webpage, press the Save button.
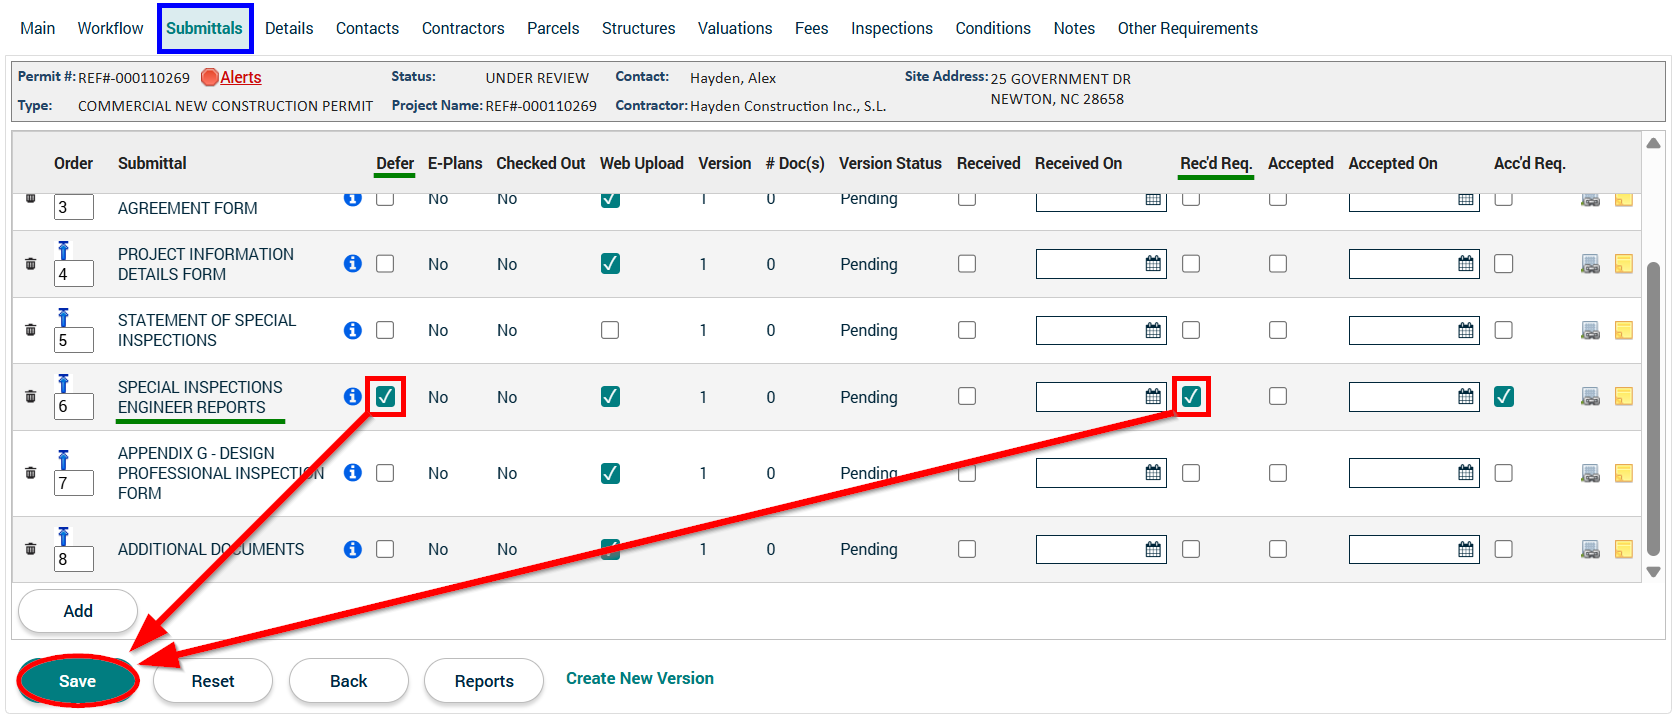
10. In the permit application, navigate to the Submittals tab and scroll down to the SPECIAL INSPECTIONS ENGINEER REPORTS submittal. On the same row as the SPECIAL INSPECTIONS ENGINEER REPORTS submittal, check the boxes for both "Defer" and "Rec'd Req." (a.k.a. "Received Required"). Then, on the bottom-left of the webpage, press the Save button.
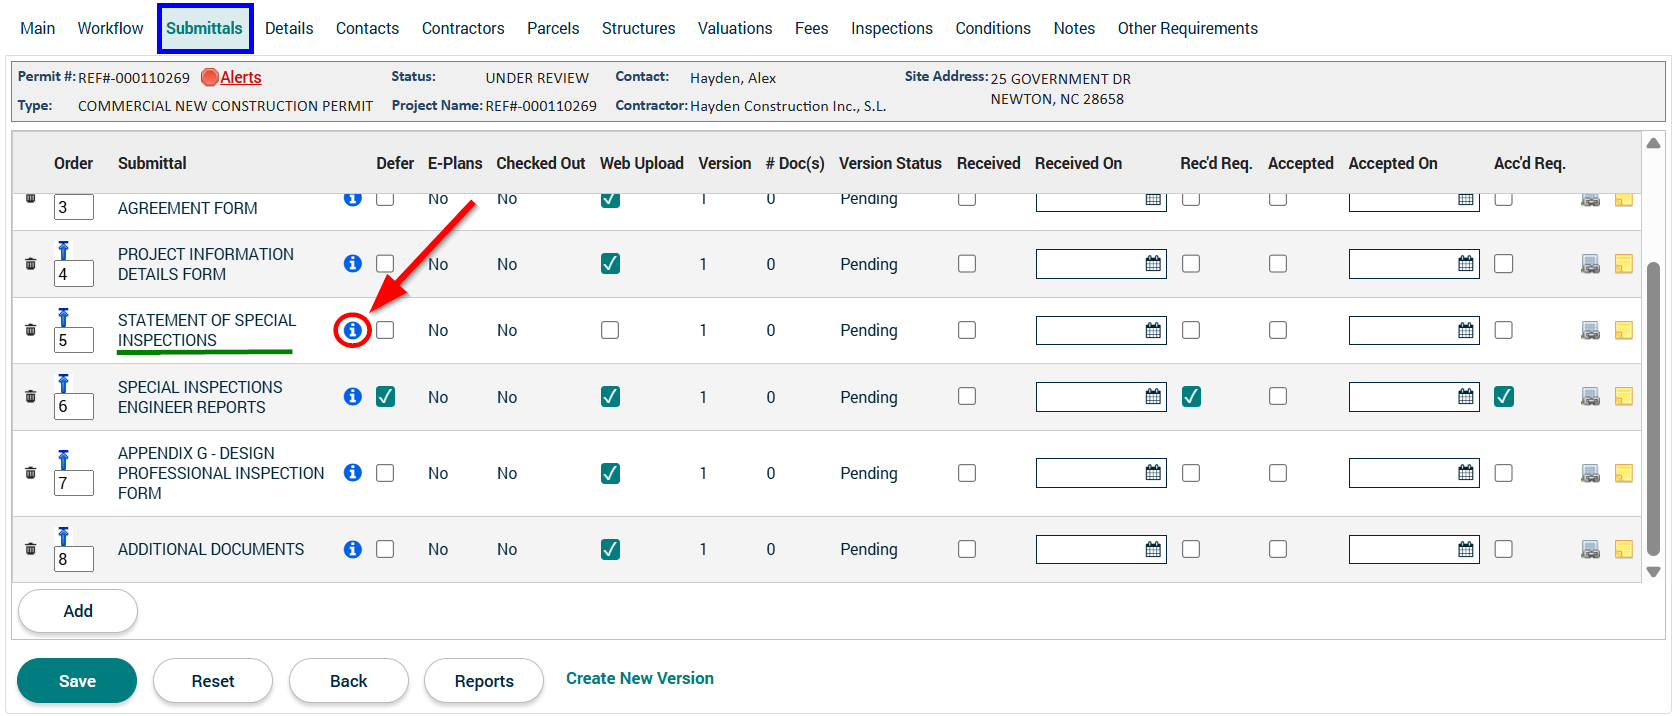
11. While still in the permit application's Submittals tab, press the blue ![]() button next to STATEMENT OF SPECIAL INSPECTIONS.
button next to STATEMENT OF SPECIAL INSPECTIONS.
12. In the Permit Submittal pop-up window, press the Add button.

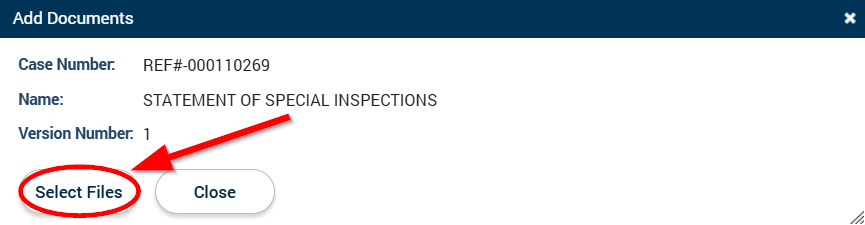
13. In the Add Documents pop-up window, press the Select Files button.
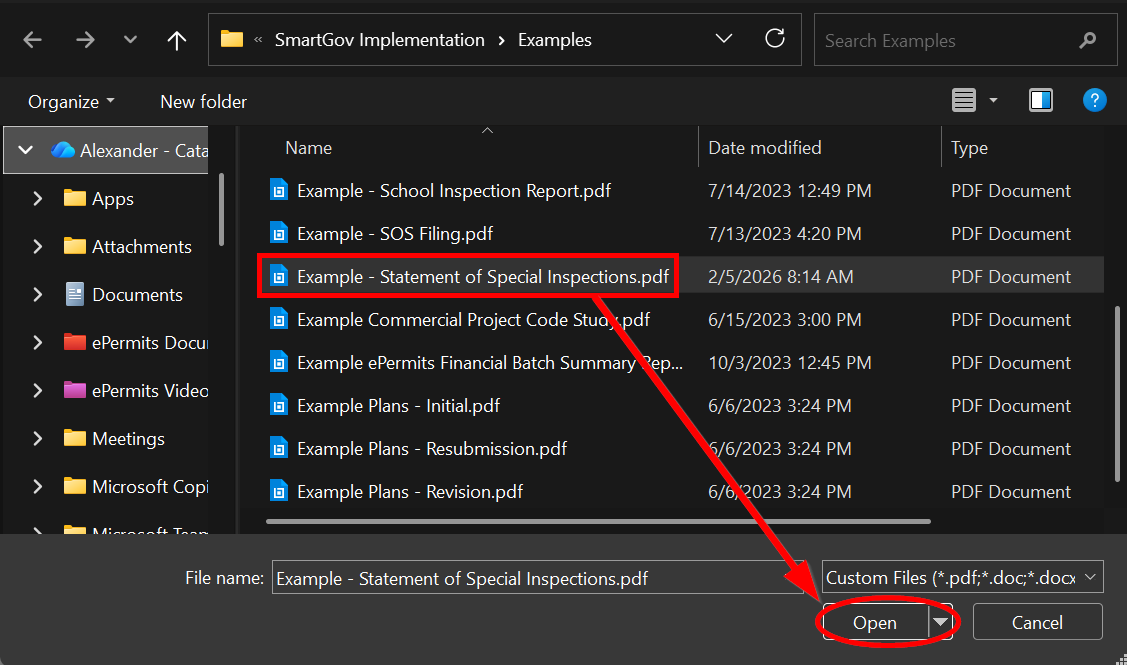
14. In the new File Explorer window, navigate to and then select the STATEMENT OF SPECIAL INSPECTIONS document which was downloaded earlier. Once selected, press the Open button on the bottom-right of the File Explorer window.
15. In the Add Documents pop-up window, wait for the upload to finish (there will be a green ![]() checkmark) and then press the Close button.
checkmark) and then press the Close button.
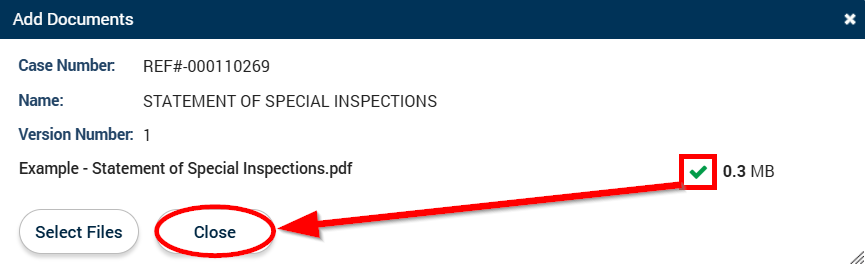
16. In the Permit Submittal popup window, press the Save button.

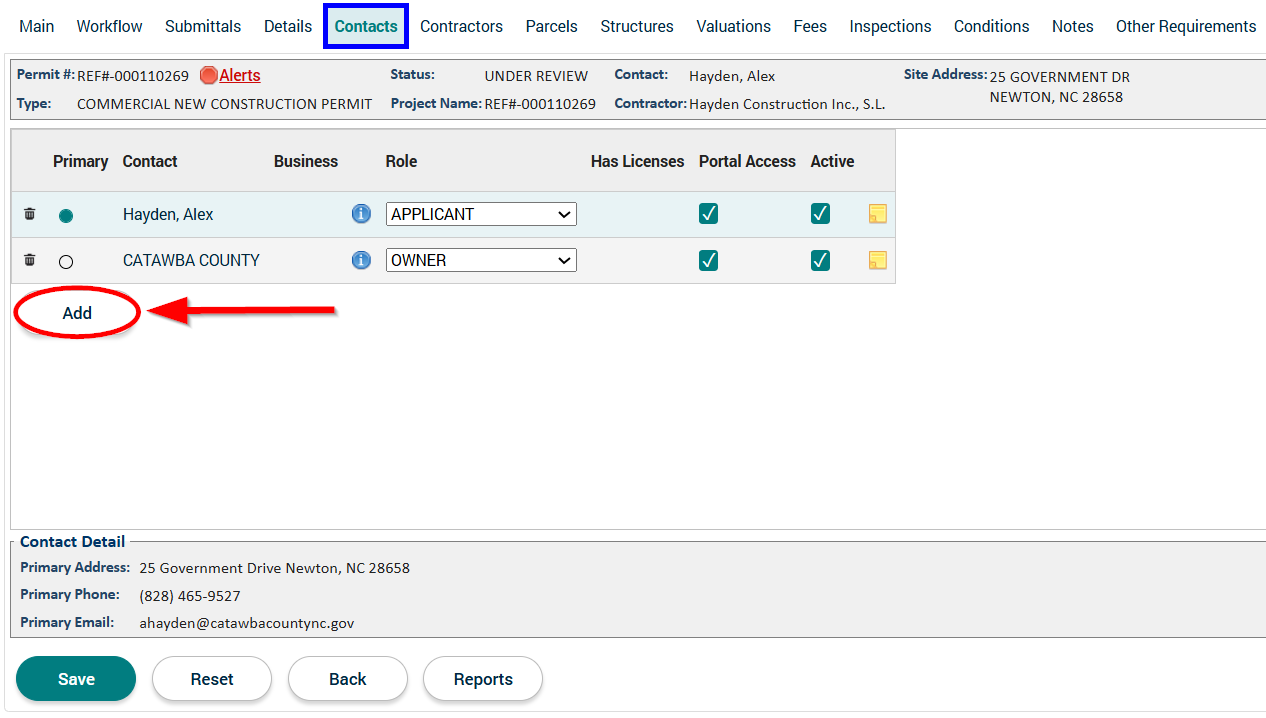
17. In the permit application, navigate to the Contacts tab and press the Add button.
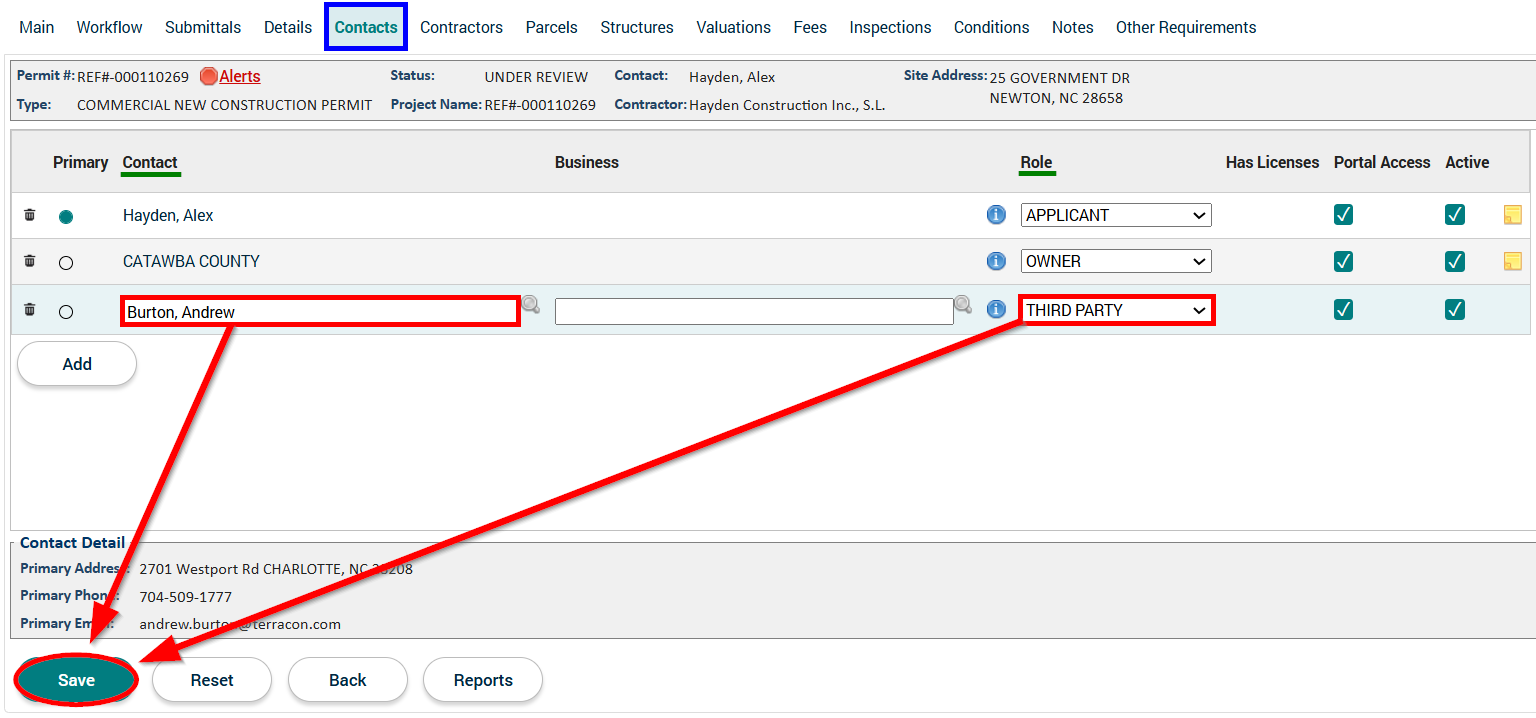
18. In the newly added "Contact" line, enter the name of the "Special Inspections Engineer of Record" found in the previously uploaded STATEMENT OF SPECIAL INSPECTIONS document. Then, select "THIRD PARTY" for the "Role" and press the Save button on the bottom-left of the webpage.
19. In the permit application, navigate to the Workflow tab, scroll down to the SET UP FOR SPECIAL INSPECTIONS ENGINEER REPORTS workflow step, and select "COMPLETED" for the SET UP FOR SPECIAL INSPECTIONS ENGINEER REPORTS workflow step's status. Lastly, on the bottom-left of the webpage, press the Save button.